Showing posts with label Cake. Show all posts

June 29, 2020

Lemon Poppy Seed Cake with Blueberry Filling (vegan option)

8:58 PM 0 Comments
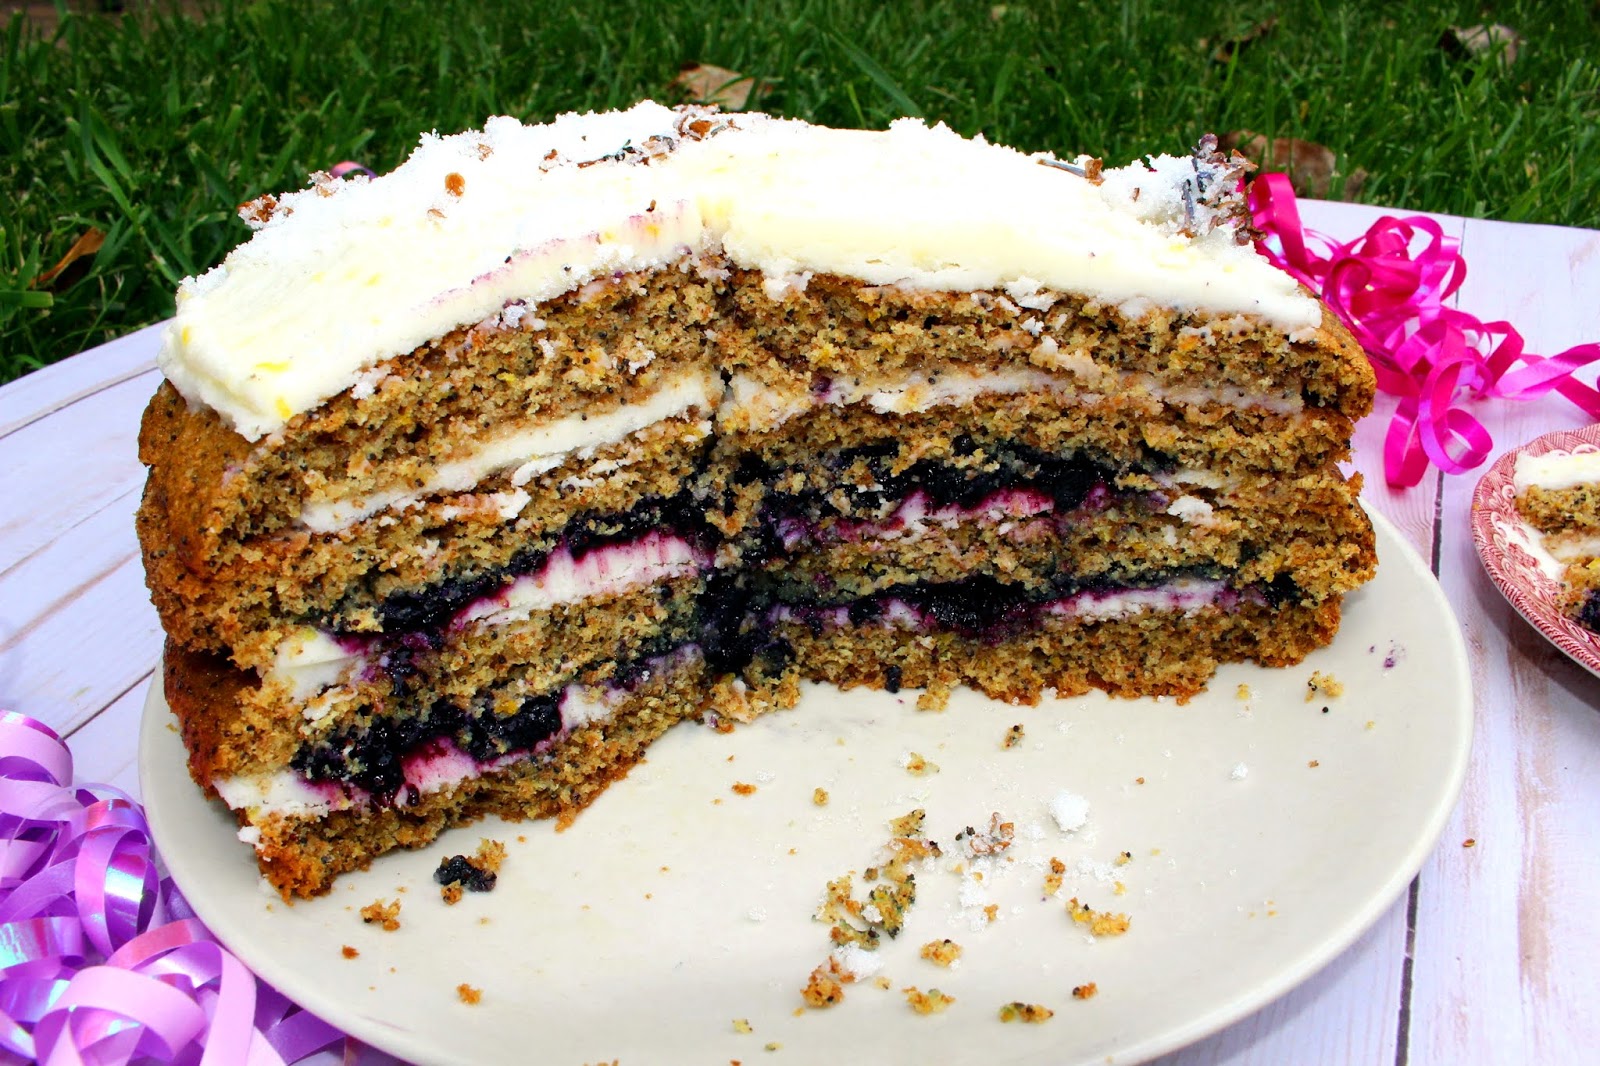
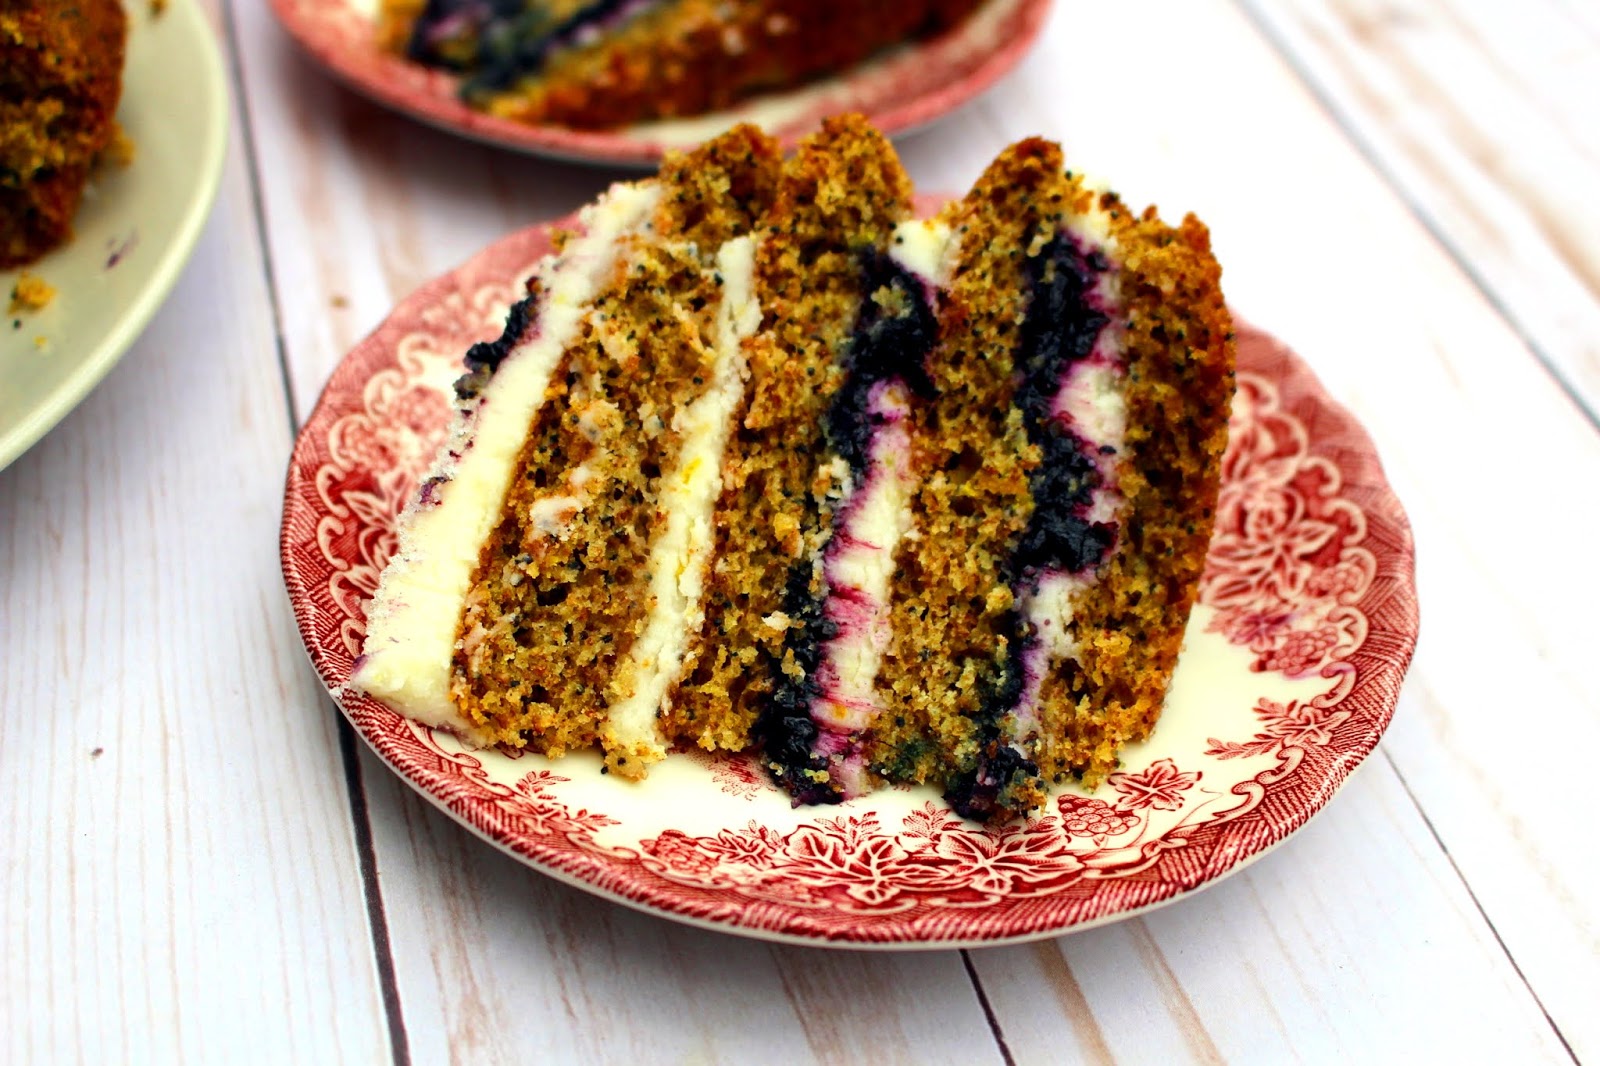
Hope everyone is having a lovely summer so far! I made this amazing and beautiful 4 tiered cake for my birthday this month! I think this may be the first time I made a 4-tier cake so it is very special to me!


This cake is showstopping with it's high layers and colorful cake and fillings! It will be great for a special occasion or nice afternoon tea. It is also surprisingly easy to make if you have a little bit of knowledge in baking.
My suggestion would be to make the blueberry jam the night before then the cake the nest day.  You could make the frosting on either day but I liked making it on the same day as the cake as it was cooling in the fridge. I highly suggest making the cakes and then saran wrapping them once cooled to place in the fridge for a couple hours as this will make it a lot easier to cut and add your fillings. 
You could make this 4 tier or just leave as a two tier if you like as well. You could even half the cake recipe if you don't need so much cake. This would give you one cake to bake and cut in half if desired. 
I made some lilac sugar a couple days before to put on top of my cake for a nice decoration and some floral notes. If it's lilac season for you this might be something you like to try! This isn't necessary and may make your cake a little messy but I thought it was a nice touch. For my lilac sugar I placed about 1/2 cup of fresh, cleaned, and patted dry lilacs in about 1 and a half to 2 cups of sugar. Then I left it for a couple days, making sure to shake everyday. If you don't shake then the sugar will stick together! I made this mistake one year and it wasn't fun. You should be able to leave the crystallized lilacs in the sugar or you could also strain them out.
You can check out where I adapted this recipe from here. Please check it out as the author gives some great detail about why she used certain ingredients. 
I love lemons, poppy seeds, and lilacs so I felt like this was the cake for me on my birthday! It turned out incredible and have rave reviews with those I shared it with. 
Best of all this is a pretty healthy cake! I used whole wheat flour and olive oil which are both excellent substitutions to make something sweet a little healthier. There is still quite a bit of sugar in this so to make it even healthier you could try coconut sugar or another sweetener.

The cake is layered with a homemade blueberry chia jam and cream cheese frosting. The blueberry jam is soooo good! I would highly suggest doubling it so you have more to put on your cake than I did. I ran out of jam (*cough* wasn't paying attention) to put on the last layer and I also think the putting some extra jam on the others wouldn't hurt. You could also layer with a different type of jam if you like. Honestly though if you have extra, I don't think that would be an issue as you'll definitely eat it with something else. 
For the cream cheese frosting, make sure you use vegan cream cheese and coconut oil (as I did) or vegan butter if you wish to make it completely vegan. You could also make a different type of vegan vanilla frosting and I think that would be great. 


Lemon Poppy Seed Cake with Blueberry Filling


Blueberry Jam
3 cups blueberries (I used frozen)
1/2 tsp ground ginger
2 tbsp maple syrup
2 tsp lemon juice
1 tsp lemon zest
2 tbsp chia seeds

Cake
1 2/3 cup almond milk
1/2 cup lemon juice (3-4 lemons)
3 cups whole wheat flour
2 tsp baking soda
1/2 tsp salt
1 1/2 cup sugar
2 tbsp lemon zest
1/2 cup olive oil
1-2 tsp lavender extract
1/2 tsp almond extract
4 tbsp poppy seeds

Cream Cheese Frosting
1/2 cup coconut oil
1 cup (8 ounces) cream cheese
1 tsp elderflower drink concentrate
4 cups powdered sugar


Directions

Jam:
  1. Place blueberries, ground ginger, maple syrup, cinnamon, and lemon juice in a saucepan on high heat. Bring mixture to a boil. This may take a few extra minutes if you're using frozen berries. 
  2. As the mixture cooks, pop any berries that you need to with the back of a wooden spoon. Stir frequently
  3. Cook for about 10 minutes. This may be shorter or longer depending on if you used frozen berries and how much you used. The jam should have reduced and thickened a bit
  4. Remove from heat and stir in chia seeds to thicken. 
  5. Once jam has cooled, you can move to a container to store in the fridge until you're ready to use it
Cake:
  1. Preheat oven 350F. Grease and line two 9 inch cake pans (you can use a different size but remember to adjust bake time)
  2. Zest lemons until you get 2 tbsp of zest. Juice lemons until you get 1/2 cup juice.
  3. Stir almond milk and lemon together in a bowl and allow to curdle for a few minutes
  4. In a large bowl, stir flour, baking soda, sugar, and salt. Pour in milk mixture and stir.
  5. Next stir in olive oil, zest, lavender extract, almond extract, and poppy seeds until combined. Do not over mix
  6. Pour batter evenly into you cake pans. If you only have one like I did then you'll have to bake, allow the first to cool, and then bake your second.
  7. Arrange cakes in middle of oven and bake for 30-35 minutes until cakes are lightly golden brown and a toothpick comes out with a few moist crumbs
  8. Remove from oven and allow cakes to cool in the pan for 10 minutes. Then remove from pan to allow to cool fully
  9. Once cooled, wrap cakes in plastic wrap and store in fridge
Frosting:
  1. To a large bowl, add in coconut oil and cream cheese. Beat on low until mixture is creamy
  2. Gradually add in powdered sugar, lemon zest, and elder flower concentrate then beat until smooth and creamy
Assemble
  1. Slice your two cakes in half horizontally. I did this by placing my cake on a flat surface and then with one hand on top, slicing through with a serrated knife. This can be a little tricky if you've never done it before. Make sure to keep the knife as straight as you can and if your knife isn't long enough, then you may need to twist your knife or turn your cake to get every edge
  2. Place one of your quarters on to your plate, spread some cream cheese on the cake and then spread your jam on top of that
  3. Place next cake layer on top and then do the same to this layer
  4. Now place one more layer and do the same. For this layer I ran out of jam so I drizzled some elder flower concentrate to add something
  5. Place your last cake on top and with any cream cheese or jam, you can decorate as you like. Top with lilac sugar if using
  6. Slice cake and enjoy!


April 14, 2020

Matcha Elderflower Loaf Cake (gluten free, vegan)

12:36 PM 0 Comments


Hey guys! I hope you're doing well. It's almost spring time!

I'm so excited that days are getting longer and the weather is getting warmer. Where I live we still get snow sometimes but I've been able to go on some bike rides already!
I know there's not much to do in this time of physical distancing so going out for some fresh air has been a priority for me. Just make sure you maintain distance from others and if you touch anything to wash your hands and clean your clothes.

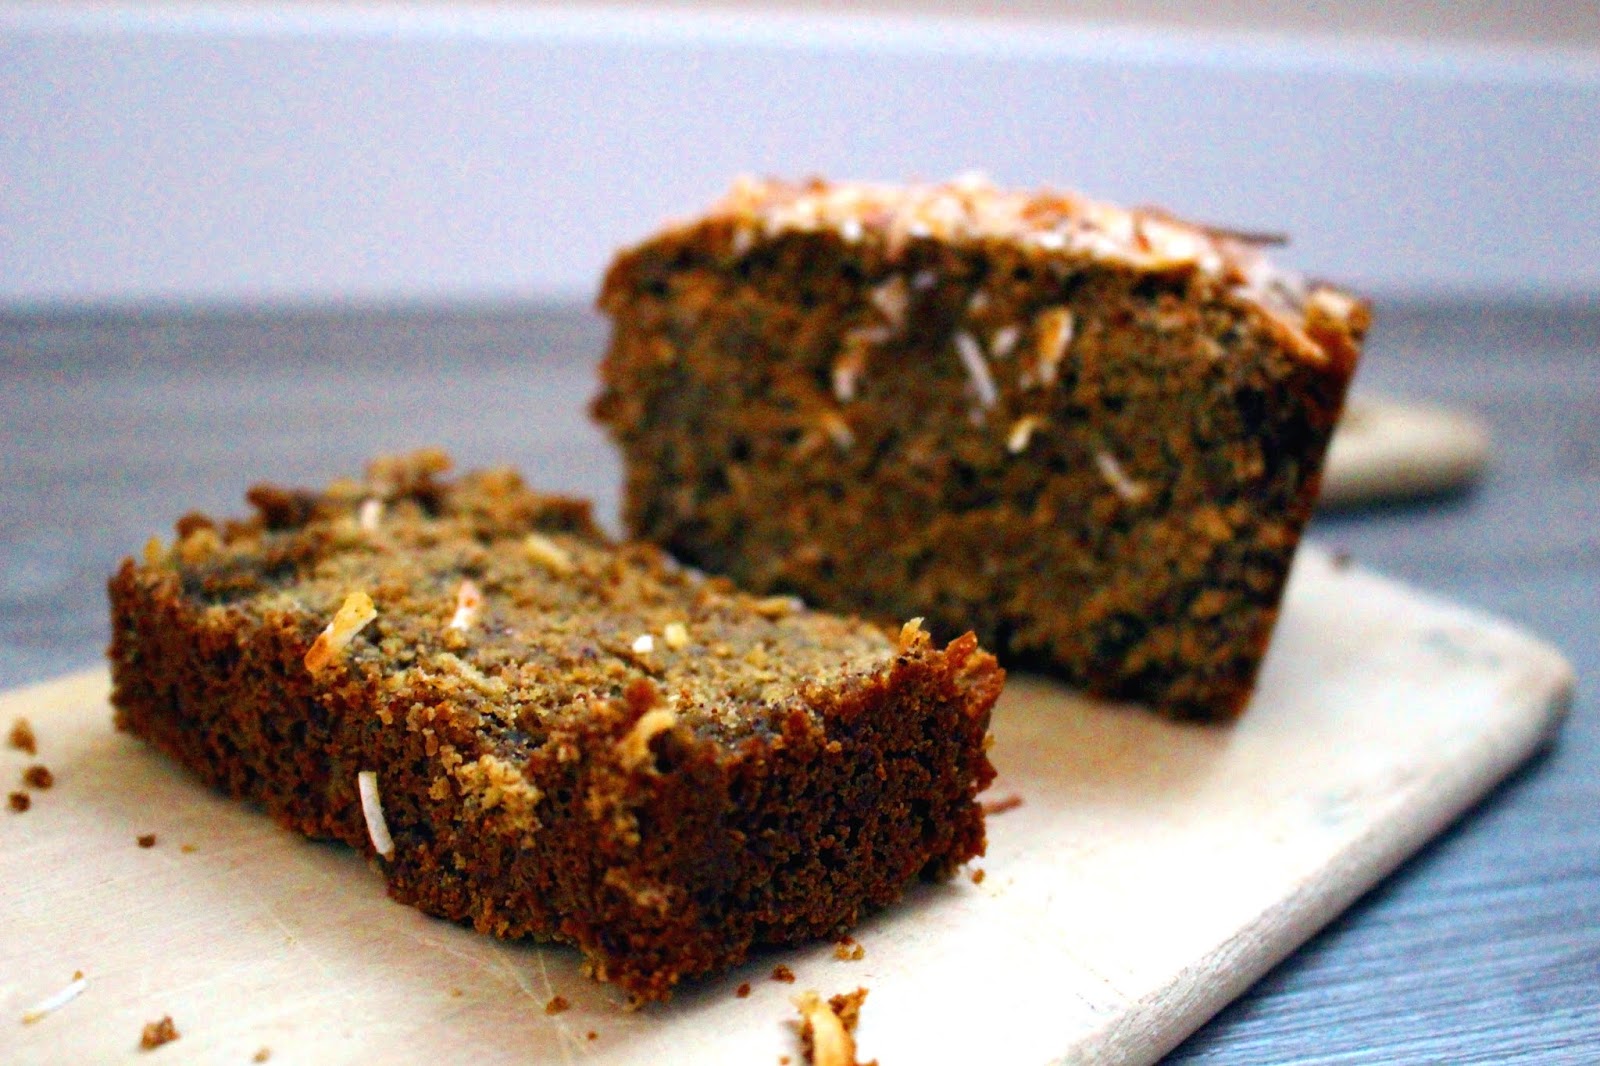
This new cake recipe is perfect for spring! It's floral, energizing, and sweet! 
I used a gluten free flour blend which made the cake taste more rustic (also had some trouble keeping it together so be careful!) but you can use any flour!

You can skip the elderflower if you don't have any or use something else but I love elderflower! I get the drink concentrate from Ikea. I think the elderflower and green tea balance each other nicely too. You get the sweet floral elderflower and the sweet, creamy, and slightly bitter matcha. It makes for a killer combination!
I also love the taste of green tea and matcha so I put tons in! You can put more or less in depending on your taste but I'm guessing that if you're reading this recipe then you love green tea too so you will appreciate this recipe!


Matcha Elderflower Loaf Cake

Ingredients
3 tbsp ground flax seed mixed with 9 tbsp water, allow to sit
1 cup almond milk
2 green tea bags
2 1/4 cup gluten free flour blend (I used a quinoa flour blend, you could also use all-purpose if you're not gluten free)
1/2 cup brown sugar (or coconut sugar)
1/4 tsp cinnamon
1-2 tbsp matcha powder
1/4 tsp salt
2 tsp baking powder
1 tsp baking soda
1/2 tsp vanilla
1/4 cup maple syrup
1/4 cup elderflower drink concentrate (or more maple syrup)
2 tbsp vinegar
1/3 cup melted coconut oil
1/2 cup shredded coconut (optional) plus more for topping

Directions
1. Preheat oven to 350F. Grease and/or line a 9x3 loaf pan
2. Gently warm almond milk and then steep your two green tea bag in it for about 10 minutes
3. Mix flour, brown sugar, cinnamon, matcha powder, salt, baking powder, and baking soda together in a large bowl
4. Add in flax seed mixture then maple syrup, elderflower concentrate, vinegar, and coconut oil one at a time. Gently mix together
5. Fold in coconut
6. Pour mixture into loaf pan
7. Bake 35-45 minutes or until a toothpick comes out clean
8. Allow to cool then slice

April 6, 2020

Healthy Ancient Roman Cheesecake

1:23 PM 0 Comments
Yes this recipe is from Christmas don't judge

This cheesecake is not only healthy but historic! It is based off an ancient Roman cake called Savillum! I based the recipe from this one so check out that link for more history of the cake!  It is made with ingredients that you would have found way back in ancient Rome. This includes cottage cheese, honey, and poppy seeds.

You may use ricotta instead of cottage cheese. I think this would be more smooth with ricotta but also ricotta is way more expensive! I thought it was still amazing and smooth with cottage cheese.
I made this for a Saturnalia party and the only photos of the whole cake I took were on my phone but I think they turned out ok!

Even though this cake is made with pretty natural ingredients, it is rich! You only need a small slice to feel happy and satisfied.


It is made with ay healthier ingredients than your typical cheesecake.

Honey- a natural sweetener which is gentler on your body than sugar. It does not spike insulin levels which may lead to eating more later. It is also sweeter than sugar so you need to use less therefore less calories!
I felt like my cake was almost a little too sweet so you may want to add less or be careful on how much you add

Cottage cheese- less fat and calories than cream cheese

Poppy seeds (optional)- rich source of calcium, iron, and magnesium. Can relieve exhaustion and anxiety

Whole wheat flour- more fibre an nutrients which keeps you fuller for longer

Obviously I added some non-traditional ingredients like the vanilla and cinnamon but I thought these made it taste even better!


Healthy Ancient Roman Cheesecake
12-24 servings

Ingredients
3 1/2 cups cottage cheese
3/8 cup honey plus 3/4 cup
1 1/4 cup whole wheat flour
1 egg
2 tsp cinnamon
1 tsp vanilla extract
1/8 tsp salt
poppy seeds

Directions
1. Preheat oven to 350F. Prep an 8" springform cake pan
2. In a bowl, combine all ingredients except the 3/4 cup honey and poppy seeds
3. Pour into your cake pan and bake for 1 hour and 40 minutes until cake is firm
4. Poke some holes with a fork on top of your cake and pour the rest of your honey on top
5. Sprinkle with poppy seeds
6. Return to oven and bake for 10 additional minutes


August 25, 2019

Lavender Lemon Loaf Cake (vegan)

1:20 PM 0 Comments

Last month I went to Seattle! This was my first time in the city and I had a blast!
I was swing dancing all night and exploring the city during the day. I went to the Pike Place Market and fell in love with the flowers there. I also went to the best thrift stores in the world (like seriously Seattle has some good stuff)
One of my favorite things about the city though was the lavender just growing everywhere!
There was lavender growing by the streets in the middle of city and big lavender plants planted by walkways. Lavender was growing like a weed!
I would often pick some lavender and just smell it as I was walking around. I have tried growing lavender where I live but it has been impossible.
If there is one thing you should know about me, it's that I love lavender. It's one of my favorite scents and flavors.
So loving lavender so much, you bet I had to make some delicious lavender things as soon as I got home!

This loaf cake is so dense and delicious. The lavender pairs wonderfully with the tart lemon flavor. You will not need to skimp out on either to get both flavors in this recipe!

You could probably get away with just the dried lavender or lavender extract in this recipe but I think having both really take it over the top!

Lavender Lemon Loaf Cake


Ingredients
3/4 cup sugar
1/2 tbsp dried lavender
1 1/2 cups flour
3 tbsp cornstarch
1 tsp baking powder
1/4 tsp baking soda
1/8 tsp salt
1/2 cup almond milk
1 tbsp lemon juice
Zest of one lemon
1/2 tsp lavender extract (or vanilla)
1/2 cup vegetable oil

For Drizzle
1 1/2 cup icing sugar
3-4 tbsp lemon juice
1/4 tsp lavender extract
some purple food coloring
*almond milk or more lemon juice if needed

Directions
1. Preheat oven to 350F. Grease a loaf pan
2. In a food processor, blend sugar and lavender until finely ground and combined in sugar
3. In a large mixing bowl, combine flour, cornstarch, baking powder, baking soda, salt, and lavender-sugar mixture
4. Make a well in dry ingredients and add almond milk, lemon juice, lemon zest, lavender extract, and vegetable oil. Stir until combined
5. Pour mixture in loaf pan and bake for 45 minutes until a toothpick comes out clean
6. Allow cake to cool and prepare drizzle
7. Place icing sugar and lemon juice in a bowl and stir until combined. Add in extract and food coloring and stir again. If needed add in more liquid to get desired consistency
8. Pour icing over cooled cake and serve. I added some more dried lavender on top

March 17, 2019

Vegan Blueberry Mojito Upside Down Cake

6:43 PM 0 Comments
Hey everyone! Hope you have been doing well. I am happy to announce that I have just landed my first full-time teaching job! It's a temporary job that will last until the end of this year but still a good step in the right direction. And I love my school too!
So let's celebrate with a mojito cake! sans alcohol but who says you can't add some.
This cake is perfectly balanced with sweet berries and mint with sour and aromatic lemon.It's perfect for a light after dinner dessert or afternoon tea. A perfect treat for the beginning of spring!
The mint syrup is super easy to make and adds a good kick to this recipe but if you really don't want to make it, don't feel pressured. I'm sure it will still taste fine without it. (of course then it won't be a mojito but to each their own).
You will most likely have some mint syrup leftover. You can use it as a garnish on top of your cake.

Vegan Blueberry Upside Down Cake
Adapted from here

Ingredients
Mint Syrup
1/2-1 tbsp dried mint leave
1/3 cup water
1/4 cup sugar

Cake
1 1/2 cups flour
1 cup sugar
1 tsp baking soda
1/4 tsp cinnamon
pinch of pink salt
1 cup water or almond milk
1/3 cup extra virgin olive oil
juice from half a lemon
lemon zest from one lemon
1/2 tsp vanilla extract
2 cups frozen blueberries

Directions
1. For mint syrup- bring all ingredients for mint syrup to a boil in a pot, remove from heat and let steep for 15 minutes. Strain out mint leaves and put aside
2. Preheat oven to 350F. Lightly grease an 8 inch round spring form pan with olive oil and then line with parchment paper
3. In a large bowl, combine flour, sugar, baking soda, cinnamon, and salt.
4. In another small bowl, combine water, olive oil, lemon juice, lemon zest, and vanilla
5. Pour wet ingredients into dry and then mix until batter is smooth
6. Brush the bottom of your pan with some of the mint syrup and then layer blueberries over top and brush the blueberries with more syrup. You probably won't use all of your syrup but use as much as you see fit!
7. Pour batter over top of berries
8. Bake for 50-60 minutes until cake is golden brown and a toothpick inserted comes out clean
9. Let cake cool before flipping over on to a plate and the carefully remove the parchment paper
10. Serve with some more of the syrup if desired

December 19, 2018

Cream Cheese Apple Coffee Cake

8:56 PM 0 Comments
Man guys this cake is sooo good! I imagine that it would be perfect for breakfast on Christmas Day but you can have it any time of year! 
I got the inspiration for this cake when I was shopping at costco and saw a cream cheese apple coffee cake there. I never tried it so I can't say how it compares but I don't know if I need to now because of how delicious this one is!
This apple coffee cake is tender with a surprise layer of cream cheese and delicious streusel topping.

My favorite part is the streusel!
If you want a show-stopping treat for breakfast, dessert, or snack then you must make this!

Cream Cheese Apple Coffee Cake

Ingredients

Cake
1/4 cup coconut oil, softened
3/4 cup brown sugar (or coconut sugar)
1 egg
1/2 cup Greek yogurt
1 tsp vanilla extract
1 cup flour
3/4 tsp cinnamon
1/4 tsp nutmeg
pinch of salt
1 1/2 cups apple, diced*

Cream Cheese
8 ounces cream cheese, softened
1 tsp vanilla extract
3 tbsp granulated sugar

Streusel
1/4 cup coconut oil. softened
1/4 cup flour
1/4 cup oats
1/2 tsp baking powder
1/4 cup brown sugar
1 tsp cinnamon

*I used about 4 gala apples but other varieties of apple such as granny smith work nicely too. Feel free to peel them if you wish. I did not because I like the peel!

Directions
1. Preheat oven to 350 and grease an 8x8 pan
2. Cream together coconut oil and brown sugar until smooth. Add in egg, Greek yogurt, and vanilla and blend again until combined
3. Add in flour, cinnamon, nutmeg, and salt and blend once more until everything is combined
4. Stir in apple and dump batter into pan
5. Cream together cream cheese, vanilla extract, and sugar until creamy. Spread on top of cake layer
6. For streusel, in a small bowl combine all ingredients until well combined and coconut oil is spread into the oats
7. Sprinkle streusel on top of cream cheese. You may want to use a knife to swirl in the layers a bit!
8. Bake for 35-40 minutes until golden brown. Allow to cool before serving

September 2, 2018

Summer Squash Bread with Chocolate Chips

8:23 AM 0 Comments


Our garden has produced a lot of huge veggies this year including yellow squash!
We have more than we know what to do with so I decided to get creative with baking. I got to thinking that maybe I could make a sweet bread with some of the squash since you can make things with pumpkin or zucchini so why not squash?
Don't get scared off because there's squash in here. I promise you that it will almost just like zucchini bread except a little more fun!
This bread tastes so good fresh out of the oven. You can eat leftovers cold or heat them up with a slather of peanut butter which makes them even more delicious

Summer Squash Bread

Ingredients
1 cup all purpose flour
1 cup spelt flour
1 tsp cinnamon
1/4 tsp nutmeg
1 tsp baking soda
1 tsp baking powder
1/2 cup vegetable oil
1/2 cup sugar
1/2 cup coconut sugar
2 eggs
1 tsp vanilla extract
1/4 cup Greek yogurt
1 cup grated squash
1/2 cup chocolate chips

Directions
1. Preheat oven to 325F. Grease a 9x5 inch loaf pan. Place grated squash in between some paper towels and allow it to sit to drain any excess water
2. In a medium bowl, mix together the flours, cinnamon, nutmeg, baking soda, and baking powder
3. In a separate bowl, whisk together the oil, sugar, coconut sugar, eggs, and vanilla
4. Stir the Greek yogurt into your wet ingredients
5. Gently fold the dry ingredients into the wet ingredients using a spoon or spatula
6. Stir in grated squash and chocolate chips
7. Pour batter into your prepared pan and bake for 50-60 minutes until golden brown on top and a toothpick inserted in the centre comes out clean

July 5, 2018

Strawberry Grapefruit Ricotta Cake

3:13 PM 0 Comments

This cake is soooo good! I don't even know what else to tell you. Just believe me when I say it's amazing! 
This cake is so soft and fluffy. It practically melts in your mouth which is perfectly balanced by the sweet fruit. 
Did you know that ricotta is one of the healthiest cheeses?! 
Ricotta is full of calcium, zinc, and vitamin A. It also tends to have less calories and fat than most other cheeses (especially if you use skim or low fat ricotta.
However, if you what to make this a little healthier you can use cottage cheese. I haven't tried this so I can't tell you how delicious it might be. Let me know if you do! I am assuming the results would be similar.
I used grapefruit and strawberries because that's what I had around but you can use any type of fruit! I also made these with rhubarb and they were delicious!

Just so you all know, I will be in Quebec for the next month! I am so excited for this new adventure. That being said, there most likely won't be any new posts until August unless by some miracle I happen to have some time!
Hope you all try this cake while I'm gone!

Strawberry Grapefruit Ricotta Cake

Ingredients
1 cup flour
1/2 cup spelt flour
1 cup sugar
2 tsp baking powder
3/4 tsp salt
1/2 tsp cinnamon
1/4 tsp nutmeg
3 eggs
1 1/2 cups ricotta
1/2 tsp vanilla
zest and juice of 1/2 a grapefruit
1/2 cup coconut oil, melted
1 cup strawberries, cut into pieces at your discretion

Directions
1. Preheat oven to 350F. Line a 9" round pan with parchment paper and lightly coat with oil
2. Whisk flours, sugar, baking powder, salt, cinnamon, and nutmeg in a large bowl
3. In another medium bowl, whisk eggs, ricotta, vanilla, grapefruit juice, and grapefruit zest until smooth. Fold wet mixture into dry until just blended. Fold in melted coconut oil and then carefully fold in 3/4 cup of the strawberries
4. Scrape batter into prepared pan and then top with the remaining strawberries
5. Bake for 50-60 minutes until golden brown and a toothpick inserted in the center comes out clean. Let cool for 20 minutes before unmolding

COPYRIGHT 2020 KATCUPCAKE.COM